# Getting started
[TOC]
## Getting the code
With all basic requirements installed, DuMux can be setup with via a Python script:
```bash
wget https://git.iws.uni-stuttgart.de/dumux-repositories/dumux/-/raw/master/bin/installdumux.py
python3 installdumux.py
```
This script creates a local folder in which it operates and does not install or modify anything system-wide.
In case you are unsure about your setup and need more information,
first read and follow the [installation instructions](installation.md).
## Running an example
For this example it is assumed that you have a folder with a similar structure:
installation folder
|- dune-common
|- build-cmake
|- dune/common
|...
|- dune-geometry
|- build-cmake
|- dune/geometry
|...
|- dune-grid
|- dune-istl
|- dune-localfunctions
|- dumux
|- build-cmake
|- test
|- examples
|- dumux
|...
|- dumux
|...
You will automatically have such a folder structure if you followed the [installation instructions](installation.md) or used the Python installation script.
We want to run an example, in which we first compute a single phase fluid flow field with heterogeneous permeability field, and then run a tracer transport simulation with the computed velocity field. A detailed example description can be found [here](https://git.iws.uni-stuttgart.de/dumux-repositories/dumux/tree/master/examples).
First, we change to the example's directory:
```bash
cd build-cmake/examples/1ptracer
```
We compile the example using GNU Make (this can take one minute):
```bash
make example_1ptracer
```
And finally we run the simulation:
```bash
./example_1ptracer
```
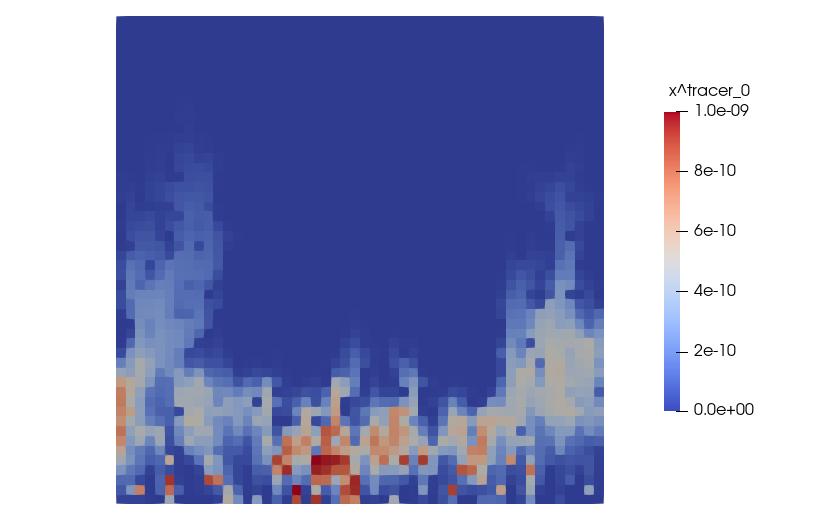
Besides console output, DuMux produces VTK output files that can be visualised with the open source visualisation tool [Paraview](http://www.paraview.org).
This output is shown in the figure below:
## Changing runtime parameters
In the config file `params.input`, we can configure runtime parameters. Let us increase the end time `TEnd` of the simulation from 5000 to 7500 seconds.
```ini
[TimeLoop]
DtInitial = 10 # [s]
MaxTimeStepSize = 10
TEnd = 7500 # [s]
```
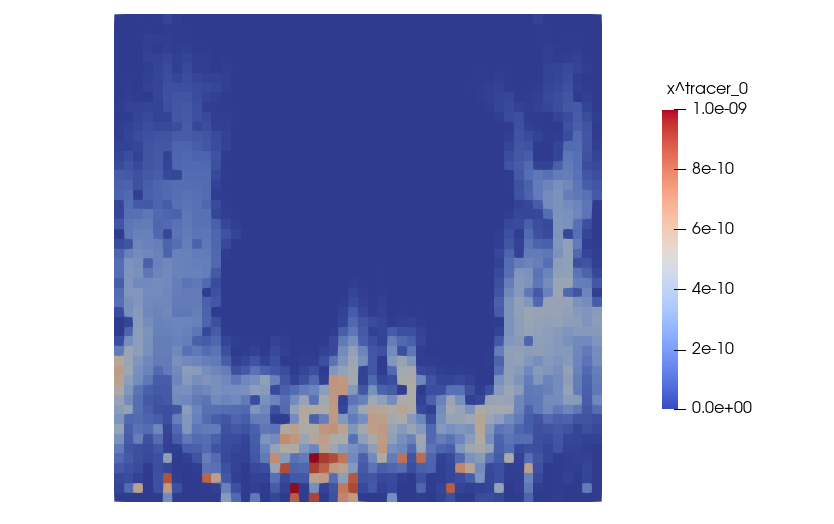
This results in the tracer travelling slightly further towards the upper end of the domain.
`[TimeLoop]` is a parameter group containing parameters configuring the time loop. The computational grid is configured in the `[Grid]` parameter group.
`UpperRight` defines the size (x-, y-direction) of the area and `Cells` the number of cells in x- and y-direction, for a structured cube grid.
If the parameter `Grid.File` is specified, the grid will be read from a grid file instead (we currently support Gmsh `.msh`, DUNE grid format `.dgf` and VTK files)
In the parameter group `[SpatialParams]`, we can define some spatially varying parameters.
In this example, the parameter file is configured such that we can set the extent of a box-shaped lens (`LensLowerLeft`, `LensUpperRight`) with different permeability than the surrounding porous media. For example, we can decrease the size of the lens and observe how the resulting concentration field is influenced by the local permeability contrast.
```ini
[SpatialParams]
LensLowerLeft = 0.4 0.4
LensUpperRight = 0.6 0.6
```
We can see that this results in the tracer spreading more homogeneously in the domain.

## Create your own module
For the purpose of developing your own application with DuMux, we recommend creating a separate DUNE module that lists DuMux as its dependency.
DUNE provides a script, that creates such a new module. In your installation folder run:
```bash
./dune-common/bin/duneproject
```
Follow the instructions popping up, and enter:
* the name of your module (e.g. `dumux-yourmodule`)
* the module dependencies (enter `dumux`)
* version of your module (e.g. `0.1`)
* your email address as maintainer of the new module
To configure your new module run `dunecontrol`:
```bash
./dune-common/bin/dunecontrol --opts=dumux/cmake.opts --only=dumux-yourmodule all
```
Note: This command only configures the new module (other modules must already be configured). If you need to configure the new module and (re)configure all dependencies, you can use `--module=dumux-yourmodule` instead of `--only=dumux-yourmodule` in the command above. This may also be necessary if the configuration with the `--only` option fails.
Now you can create your own test case. Enter the `dumux-yourmodule` folder and create a new folder (e.g. `appl`), that will contain your first test case.
```bash
mkdir appl
```
An easy and fast way to get the files for your test case is to copy an existing test from DuMux.
We copy the following files from an incompressible single fluid phase flow model test application in `dumux/test/porousmediumflow/1p/implicit/compressible/stationary`:
* `main.cc`
* `problem.hh`
* `spatialparams.hh`
* `params.input`
To be able to configure and build your application with CMake, you need to first add the new `appl` subdirectory to the `CMakeLists.txt` file in `dumux-yourmodule`:
```cmake
add_subdirectory(appl)
```
Inside the `appl` folder, create a new `CMakeLists.txt` and add the test case to it:
```cmake
# add a new finite volume 1p test
dumux_add_test(NAME test_1p_compressible_stationary_tpfa
SOURCES main.cc
COMPILE_DEFINITIONS TYPETAG=OnePCompressibleTpfa)
# add a symlink for the input file in the build folder
dune_symlink_to_source_files(FILES "params.input")
```
Now you need to reconfigure the module by typing (inside the folder `dumux-yourmodule`):
```bash
cmake build-cmake
```
As the last step, build and execute your new test case:
```bash
cd build-cmake
make build_tests
cd appl
./test_1p_compressible_stationary_tpfa params.input
```
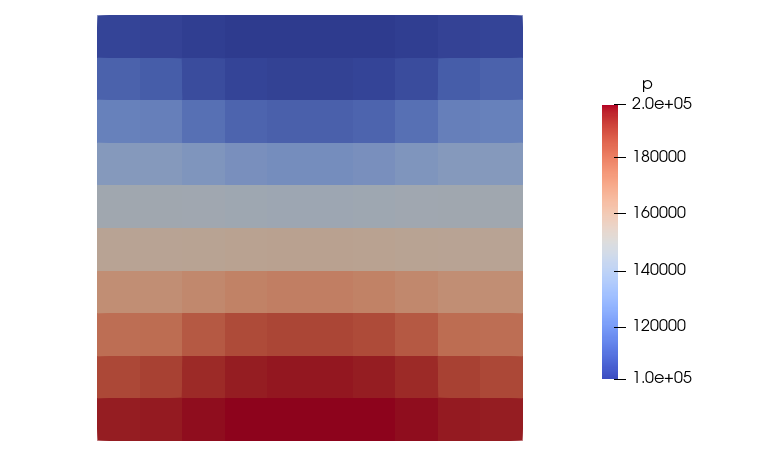
This result visualized with ParaView should look something like this:
## Next steps
To learn more about DuMux, we highly recommend the [DuMux course](https://git.iws.uni-stuttgart.de/dumux-repositories/dumux-course). During the [exercises](https://git.iws.uni-stuttgart.de/dumux-repositories/dumux-course/tree/master/exercises) you get a deeper insight into the structure of DuMux and its different applications.
Furthermore, DuMux contains several [documented example applications](https://git.iws.uni-stuttgart.de/dumux-repositories/dumux/-/blob/master/examples/README.md).